Smart Pet Potty Training System
Role: IoT Developer & Hardware Engineer | Duration: Feb 2022 - June 2022
An innovative IoT-based solution designed to automate and enhance pet potty training through intelligent monitoring and reward systems. The system uses a combination of high-precision load cells and moisture sensors to detect when pets use their designated area, automatically dispensing treats for positive reinforcement while providing real-time monitoring capabilities through a mobile app interface.
The project integrates hardware components like the Arduino Nano for local control and ESP32 for WiFi connectivity, with a custom-designed treat dispensing mechanism and comprehensive sensor array. The software stack includes C++ firmware for microcontrollers and Blynk IoT platform integration for remote monitoring and control.
Automated Detection
Weight and moisture sensors for accurate usage detection
Mobile Control
Real-time monitoring and control via Blynk app
Data Analytics
Usage patterns and behavior tracking
System Architecture
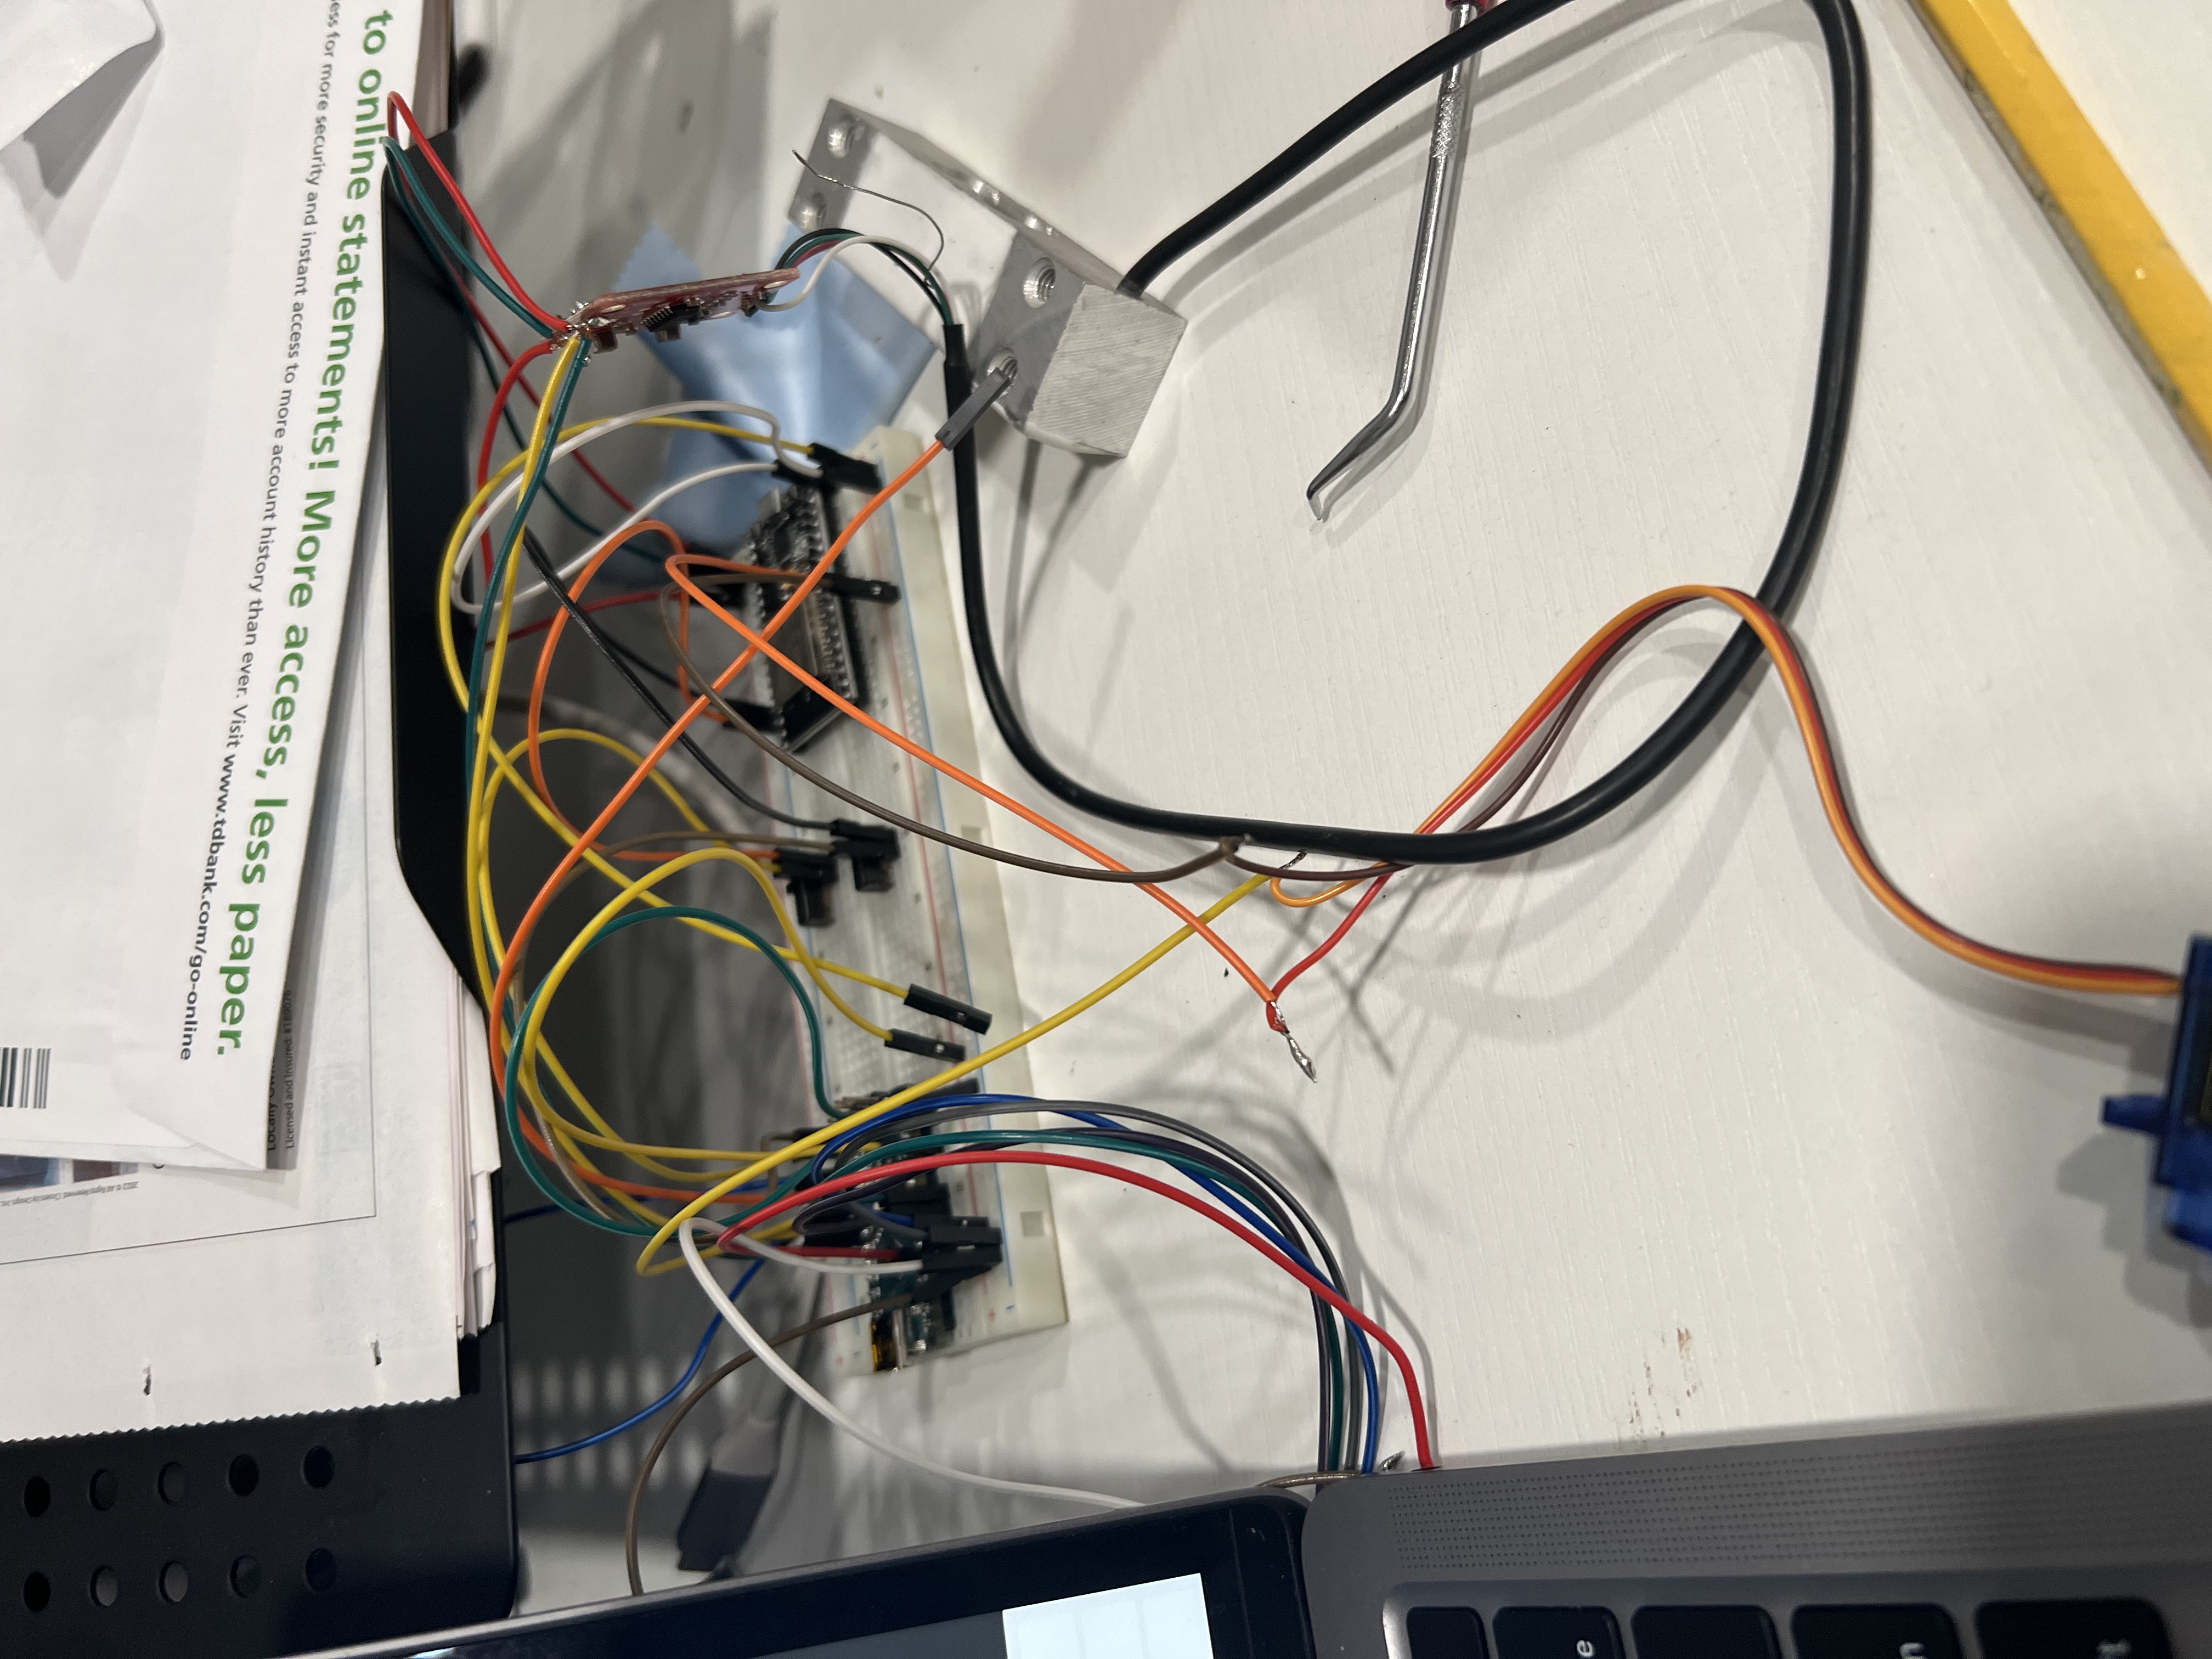
Hardware Components
Device Gallery

Functionality Demo
Core Components
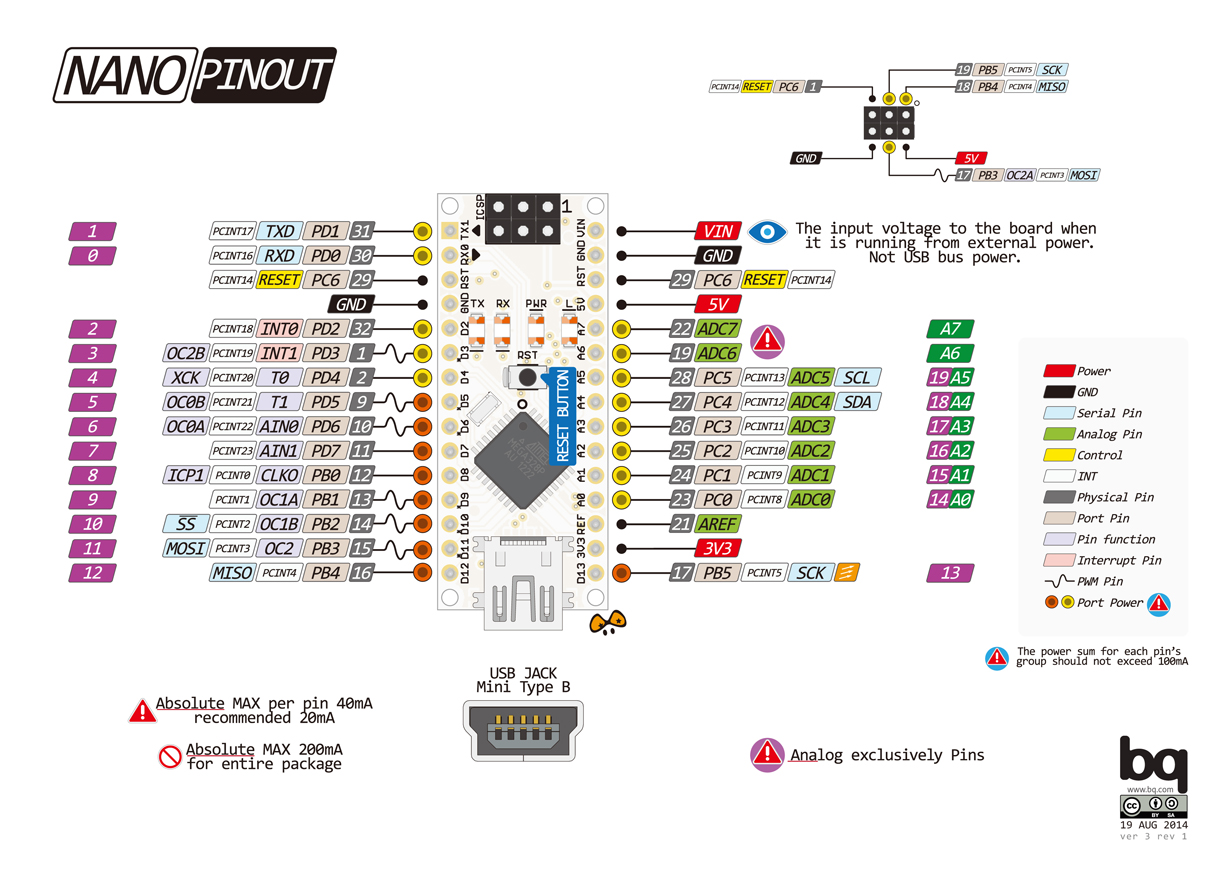
- Arduino Nano (Control Unit)
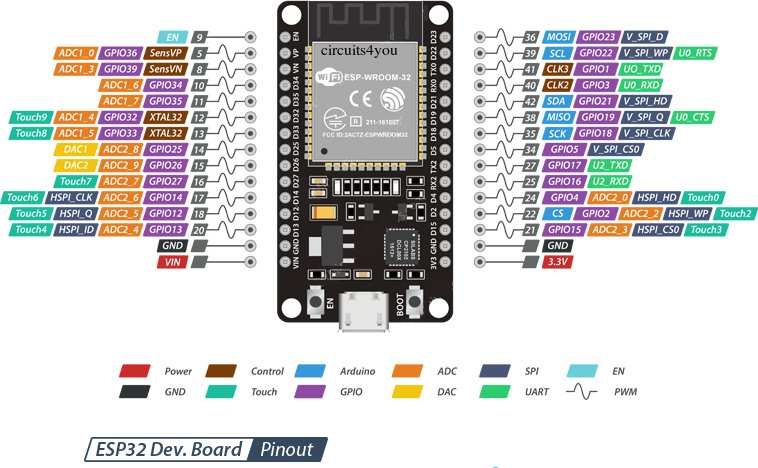
- ESP32 (WiFi Module)
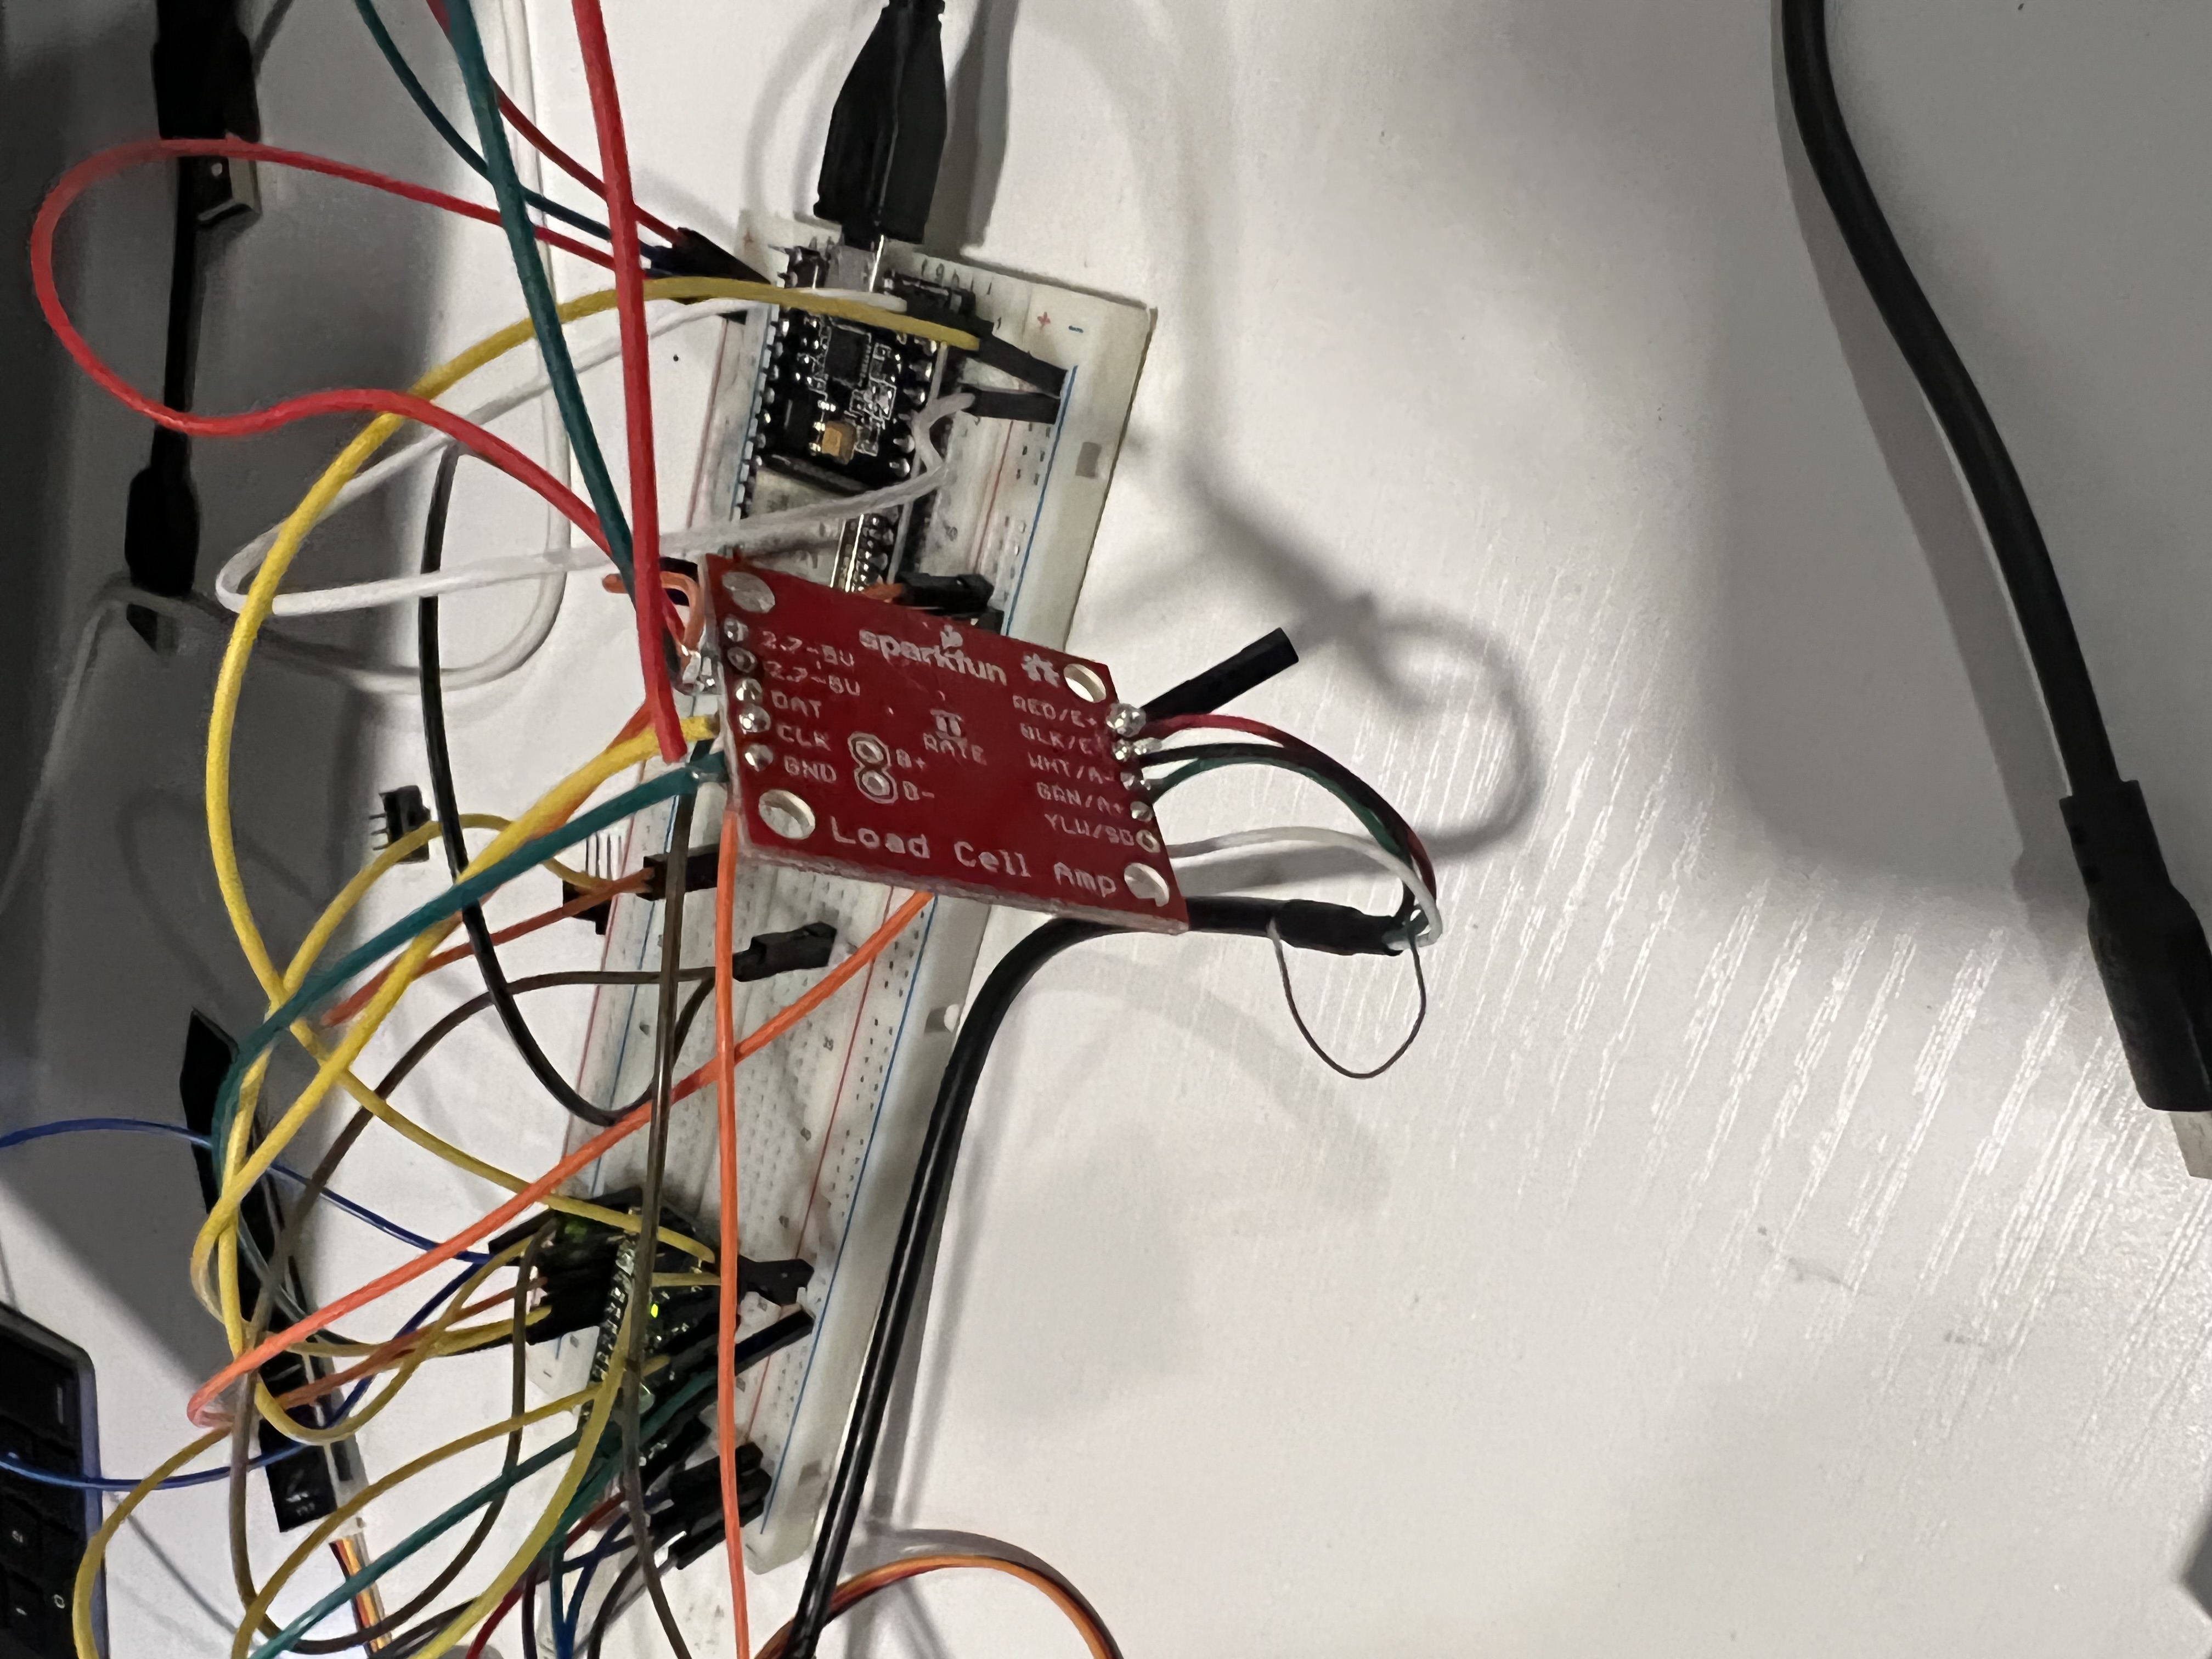
- Load Cell + HX711
- Moisture Sensor
Output Devices
- I2C LCD Display
- Piezo Buzzer
- Servo Motor (Treat Dispenser)
Pin Connections
Arduino Nano
- A1 → Moisture Sensor
- A4/A5 → LCD (I2C)
- D2 → Buzzer
- D3 → Servo Motor
- D4/D5 → Load Cell (HX711)
ESP32
- GPIO16/17 → Serial Comm
- VIN → 5V Power
- GND → Common Ground
Software Implementation
Firmware Features
- Weight calibration and tare functionality
- Moisture threshold detection
- Treat dispensing logic
- Serial communication protocol
// Weight Sensor Calibration
void calibrateLoadCell() {
  LoadCell.begin();
  LoadCell.start(2000);
  LoadCell.setCalFactor(calibrationValue);

  // Tare the scale
  LoadCell.tare();
  Serial.println("Scale tared!");
}

// Moisture Detection
bool checkMoisture() {
  int moistureLevel = analogRead(MOISTURE_PIN);
  return moistureLevel > MOISTURE_THRESHOLD;
}

// Treat Dispensing
void dispenseTreat() {
  treatServo.write(DISPENSE_ANGLE);
  delay(500);
  treatServo.write(REST_ANGLE);
}
Blynk Integration
| Component | Widget Type | Pin | Function |
|---|---|---|---|
| Mode | Slider | V1 | Operation Mode Control |
| Weight | Gauge | V2 | Weight Display |
| Moisture | Gauge | V3 | Moisture Level Display |
| Treat Status | LED & Chart | V4 | Treat Dispenser Status |
// Blynk Event Handlers
BLYNK_WRITE(V1) {
  operationMode = param.asInt();
}

BLYNK_WRITE(V2) {
  // Update weight display
  Blynk.virtualWrite(V2, currentWeight);
}

// Main Loop with Blynk
void loop() {
  Blynk.run();
  timer.run();

  if (LoadCell.update()) {
    currentWeight = LoadCell.getData();
    Blynk.virtualWrite(V2, currentWeight);
  }

  // Check moisture and update
  int moisture = analogRead(MOISTURE_PIN);
  Blynk.virtualWrite(V3, moisture);
}
Development Process
Project Planning
Week 1
- Initial concept development
- Hardware component selection
- System architecture design
- Load cell research and testing
Core Development
Week 2
- Circuit design and prototyping
- Load cell and HX711 integration
- Basic firmware implementation
- Treat dispenser mechanism design
IoT Integration
Week 3
- ESP32 WiFi setup
- Blynk platform integration
- Mobile app configuration
- Real-time monitoring setup
Completion
Week 4
- System testing and calibration
- Performance optimization
- Documentation creation
- Final deployment
Development Time
4 Weeks
Rapid prototyping and implementation
Components
8+
Integrated hardware modules
Code Base
500+
Lines of embedded C++
Success Rate
95%
Detection accuracy
Project Resources
Documentation
Setup guides and reference materials